Hi, I’m trying to install the Energy Monitoring Set. Mainly the Finder 7M.38.8.400.0112 and the new VMB8IN-20. However, because the 8IN is so new, there are no wiring diagrams available. Could someone please provide me with intructions how to install this? Thanks in advance!
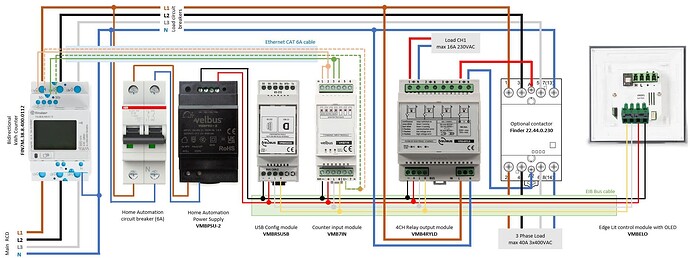
This is the wiring diagram for the VMB7IN
I guess we need info from the people closer to the company. I don´t see any info if there are dedicated pulse inputs, or all are pulse inputs. Check in VelbusLink if you can set input 1 to 4 to be pulse inputs:

I have the same meter, but with the older input module. Reference post: My Velbus journey - #8 by PrzemoF
We will update the quickstart guide and connection diagram to include the VMB8IN-20.
A difference in comparison with the VMB7IN is that it is no longer require to use 2 counters for the same counter, as the VMB8IN-20 supports multiple alarms per counter channel.
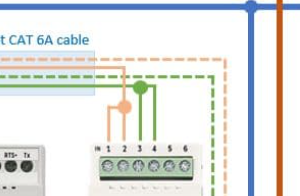
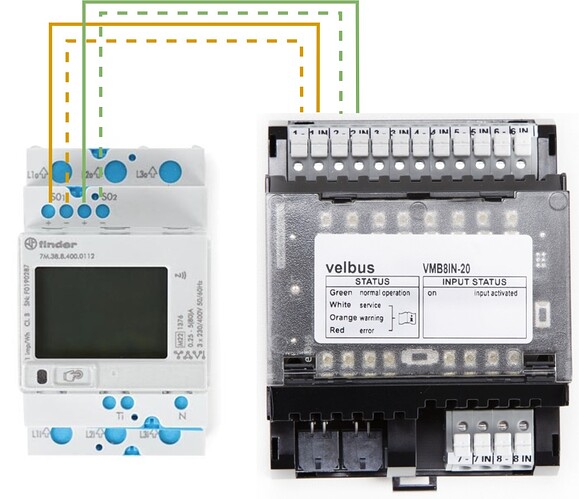
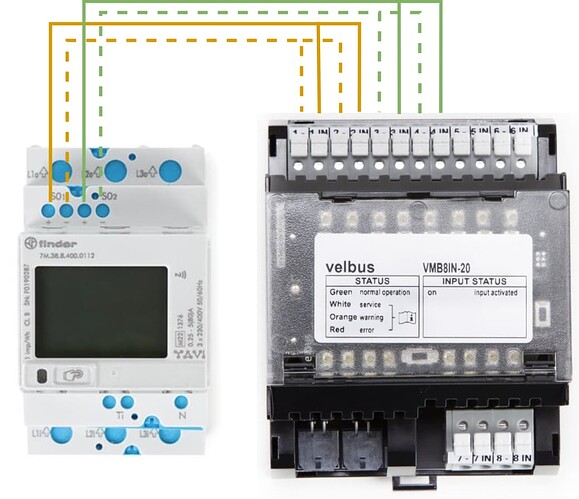
Thanks for your reply! If I understand correctly, I can just use channel 1 (orange) and 2 (green). Something like this?
Is it possible to use the BUS cable instead of CAT? Because I read that BUS is more stable than CAT.
What do you mean by BUS and CAT cables?
Do you need a full wiring diagram?
The only difference between a VMB7IN and the new VMB8IN-20 (in this scenario) is that the VMB8IN-20 has 8 inputs, instead of 7.
They are labelled the same, so just match the markings of the VMB7IN on this diagram to the terminals on the VMB8IN-20.
EIB / CANbus data cables are the ONLY ones we should ever use.
NEVER use Cat5e / CAT6 for CANBus & module power
(Others have, with varying levels of success. The size of the cores within CANbus cable is really important)
Examples
Velbus V2.0 modules have spring terminals, which requires the Solid core cable to defeat the spring on entry.
Multi-strand cable above is too big to fit in the glass panel connectors.
I dare to say that the communication between the Input module and the meter is neither velbus nor ethernet. It’s a low frequency pulse on very short distance - even a paper clip wire in plastic would be enough. ![]()
If you’re asking for velbus network - as per MDAR post. You don’t want to deal with voltage drop once you get close to the network current limit. One problem less to think about…
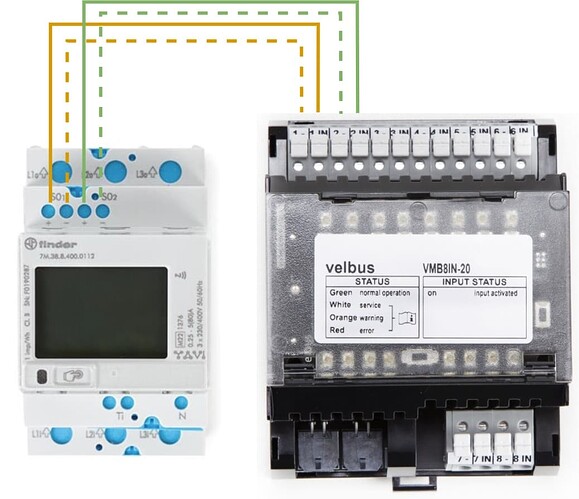
So I installed the VMB8IN-20 like this
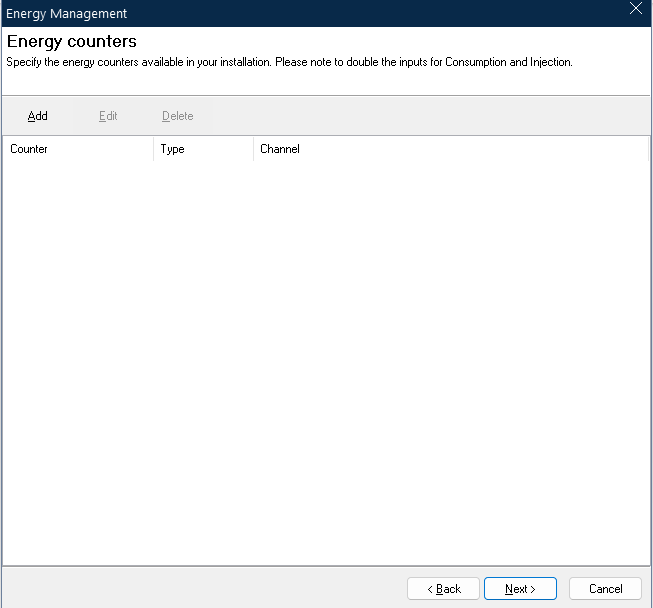
but I couldn’t find the FINDER module in Velbuslink under the Energy Management option.
Then I tried changing and bridging the wires like it was on the previous version
However, I still can’t manage to find the counter.
When I click on ‘Add’ I get the following error
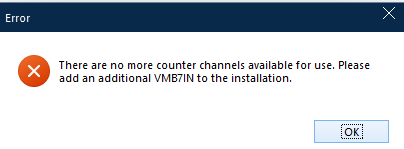
Is it possible that the software needs to be updated and this will be fixed? Thanks for your reply!
The immediate question is: is your VelbusLink up-to-date?
I genuinely don’t know if the most recent version supports it as I haven’t VMB8IN-20ies myself, but you did not mention updating VelbusLink, so I had to ask.
Thanks for your reply. Fair question. I was running Velbuslink 11.3 so I updated to 11.4.0 but the issue still remains.
In that case you can still set this up, except it will be a little bit more manual than using the wizard (all the wizard does is configure the pulse counter and display module using the Configure... dialog.)
Here some tips before somebody writes a full guide (or Velbus Link is updated to support the wizard for VMB8IN-20):
-
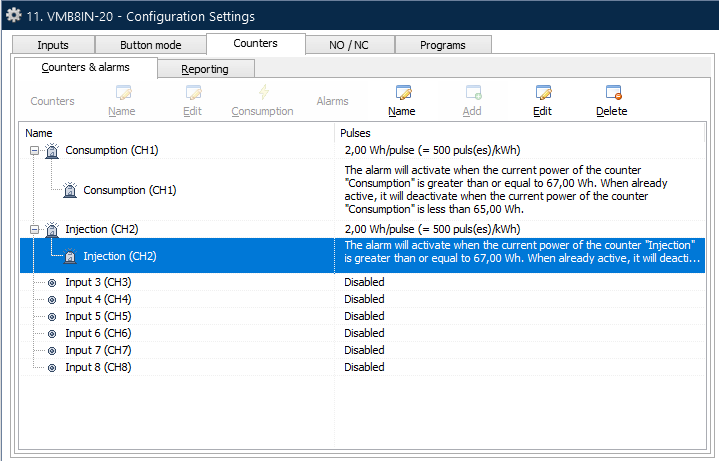
Rightclick on your VMB8IN-20 module, click Configure… then go to the “Counters” tab. There set up the counters 1 and 2 for Import and Export (also, rename the channels accordingly in the first tab.) That’s the set-up for the VMB8IN-20 side.
-
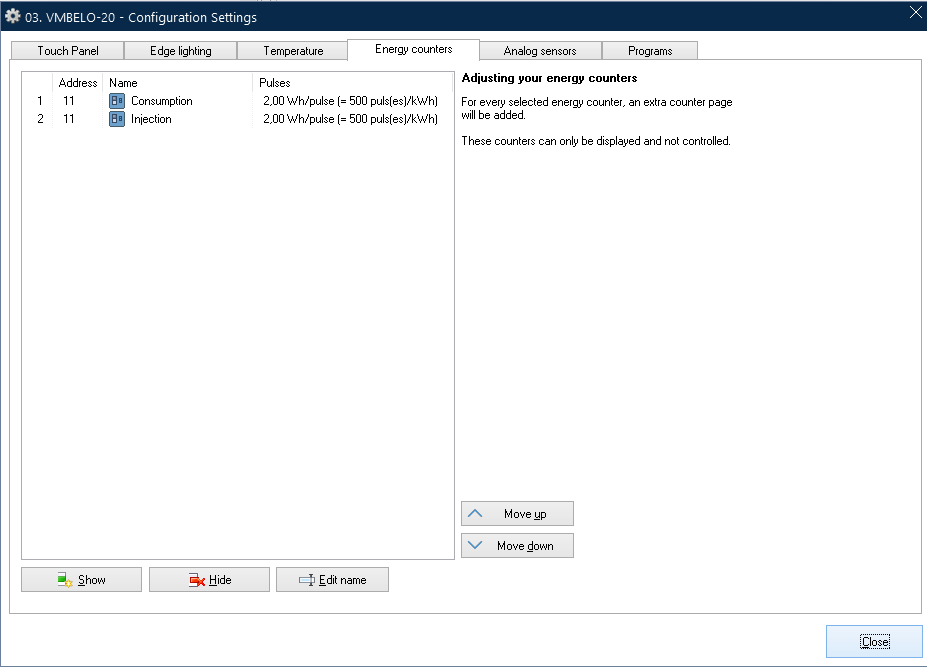
Then configure the edge-lit oled panel to display those counters (again: rightclick → configure → energy counters…)
Not great to have to do this manually, but should hopefully work well enough for the time being.
Thanks a lot for your insight! Just to confirm I did everything right, because the UI changed slightly. This is my configuration of VMB8IN-20
This is my configuration of VMBELO-20
I will check if there’s still an issue with VelbusLink energy monitoring wizard.
@VEL524 Any update on this? When can we expect it to roll out/in which release? Thanks.
@ VEL524 Any update on this ?
I did receive an update on this. I submitted a service desk ticket and I got a response. They say that they won’t update the Energy Monitoring in VelbusLink to support the VMB8IN-20 natively because that module has way more alarm channels than the 7 meaning it’s not as difficult to configure as the 7IN.
They provided me with some steps that I was able to execute successfully. Here is my explanation:
- Right click on VMB8IN-20 and select “Configure”
- Go to the counters tab
- Set up counter 1 and 2 for import and export. Depending on how you connected the Velbus module to the Finder module. In my case counter 1 is Consumption and counter 2 is Injection
- Rename the channels accordingly
- Configure Consumption (CH1) as 2,00 Wh/pulse (=500 puls(es)/kWh) and the same for Injection (CH2)
- Add Consumption alarms to monitor the desired consumption stages (0 - 3.5 kW, 3.5 - 5 kW, 5 - 7 kW, >7 kW)
- Click on Consumption and add the alarms and configure the stages. Do the same for Injection
- Configure the Edge Lit panel by right clicking and selecting “Configure”
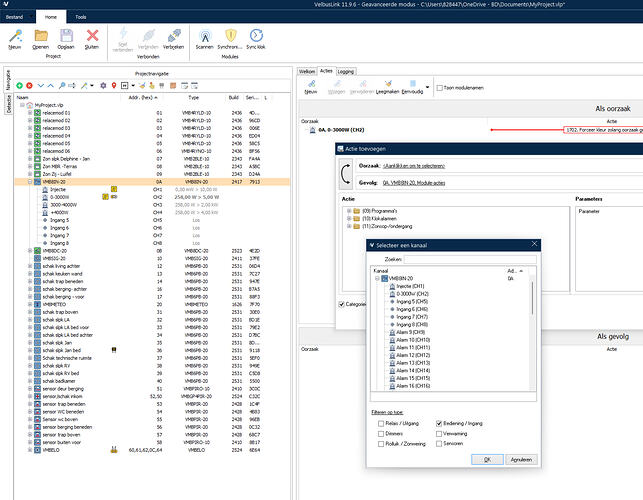
- Add actions to the module itself so not a channel
- The actions should be 1702. Select the colour you want to display when a given alarm is being pressed, select which sides of the panel should be lit and then do the same for other alarms. I didn’t change the priority as they are all equal in my case.
- Synchronise the changes to the modules and you should be OK.
It can take a little while for the changes to kick in, in the meantime you can test it by manually clicking the channel that has the alarm and checking if the colours on the panel change.
Hope this helps, if you have any further questions don’t hesitate and I’ll do my best to help you
Thanks William for this update.
How did you made the connection?
Like this?
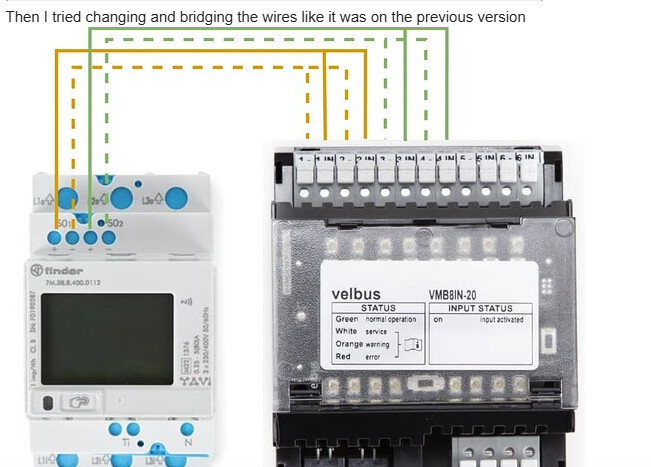
Thanks in advance
Wouter
FYI
@williamcoenen says, it’s a lot easier with the new VMB8IN-20 because it can have multiple triggers / alarms per input.
You don’t need to double up the inputs as per your drawing ![]()
That’s right, this is the correct wiring diagram. The other one is wrong and is only applicable to the 7IN
